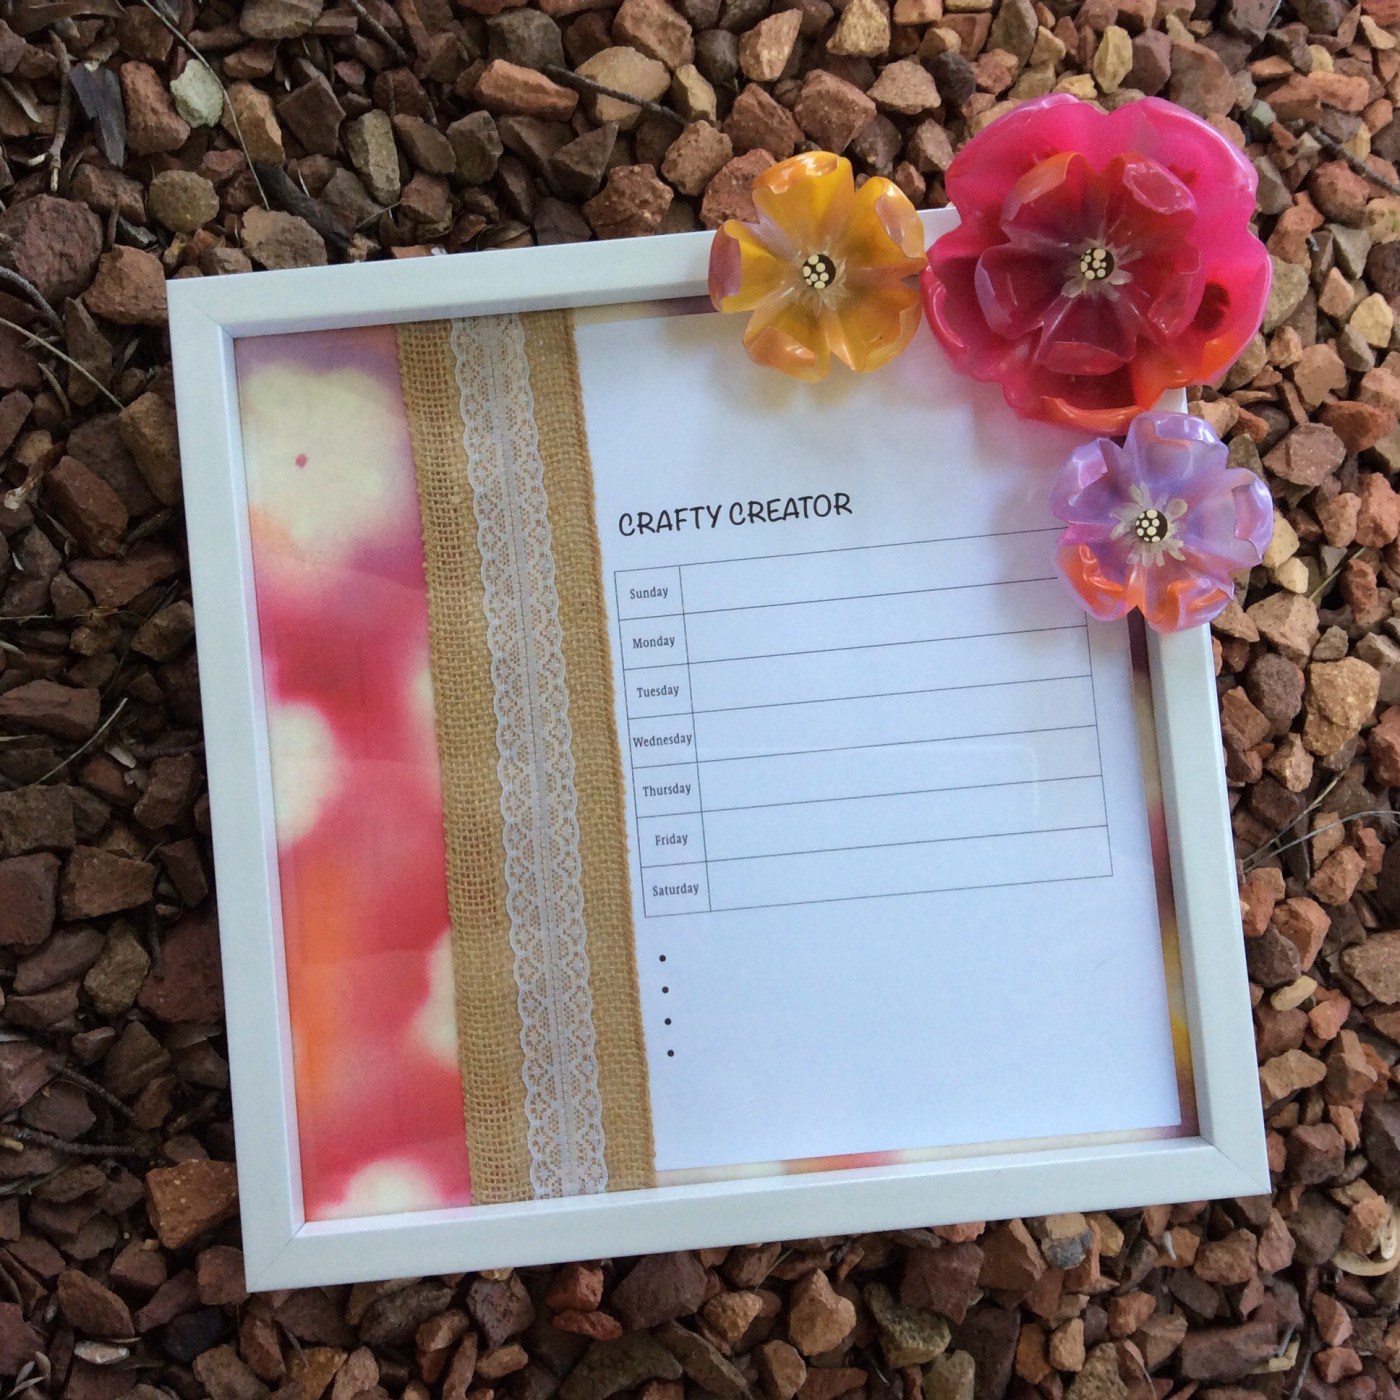
The very first thing I decided to make, with my colourful plastic bottle flowers, was a dry erase board to help me keep this blog on track. Personally I think it turned out great and hopefully, with its help, I will put up posts on a regular basis.
Materials:
frame (mine is 11 3/8 inches square – internal dimension)- colourful or patterned paper (I used the paper that was covering my table top when I spray painted my plastic bottle flowers)
- printed white sheet of paper (created using Pages on my iPad)
- jute ribbon
- pencil
- scissors
- glue dots or double-sided tape
- roofing nails
- acrylic paint (I used Burnt Umber and Antique White)
- small paint brush
- completed plastic bottle flowers (see previous post How to make beautiful water bottle flowers)
- glue gun with hot melt

Putting it all together (in other words Instructions):
- Flip your chosen frame over, take off the backing board and remove any picture mats or sample pictures that your frame came with. Using the backing board, trace its outline with a pencil, onto the back of your coloured or patterned paper. With scissors cut along the pencil line. Take glue dots or double-sided tape and stick this paper onto the side of the backing board that you would normally see through the glass of the frame. Dry place (or place without gluing) your printed sheet and jute trim on top of your coloured background, move it around until you find a placement that you are happy with, and then glue dot them down. Reassemble your frame and backing board.

- To add a finishing touch to my plastic bottle flowers, I need to add its centre. I did this by first painting a layer of Burnt Umber acrylic paint on the head of a roofing nail. Then by adding further details with dots in Antique White acrylic paint. Let these middles dry completely. Next drill a hole through the middle of the plastic bottle flowers and push the painted nails through this hole, they do not need to sit flush, it just adds more dimension if they stick out a little. Now I do realize that not everyone has roofing rails or a drill lying around their homes, so instead you could just add this detailed middle by painting a piece of small round cardboard or using a button. Then hot glue this to the centre of your flowers.


- Now that your flowers are complete dry place them on the edge of your frame. When you have them where you want them to go, hot melt them down.


I know that keeping organized is a very important skill to have and I admire those that seem to have mastered this skill. I however am not one of those people, so maybe this dry erase board will be a stepping stone for me into the world of organization. Or maybe not, we’ll just have to wait and see.
