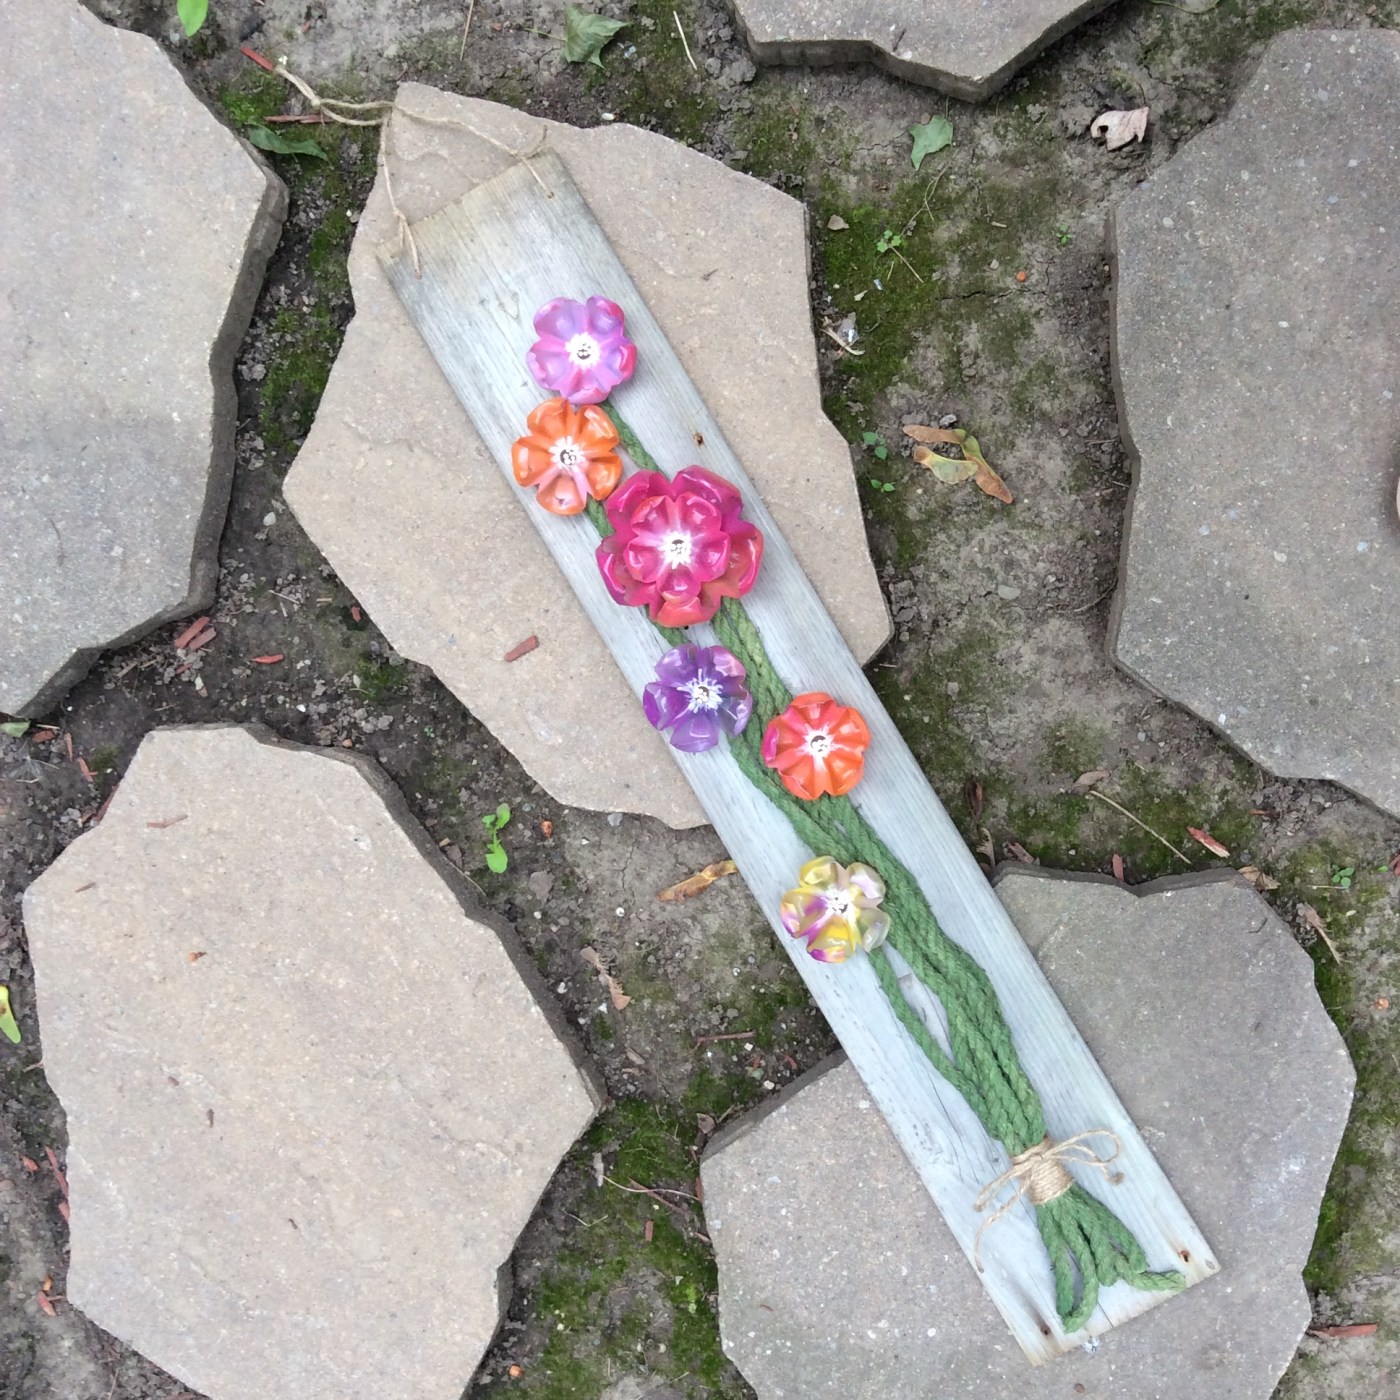
Green jute – check. Water bottle flowers – check. Old fence board – check. I can now put together the project that I have been carrying around in my head, for some time. Last summer a section of our front yard fence fell down and ever since that time I’ve been wanting to use the weathered and worn boards for a project. So I stored them away, and when I finished making my water bottle flowers I figured those boards would make the perfect background. With no further adieu here we go …
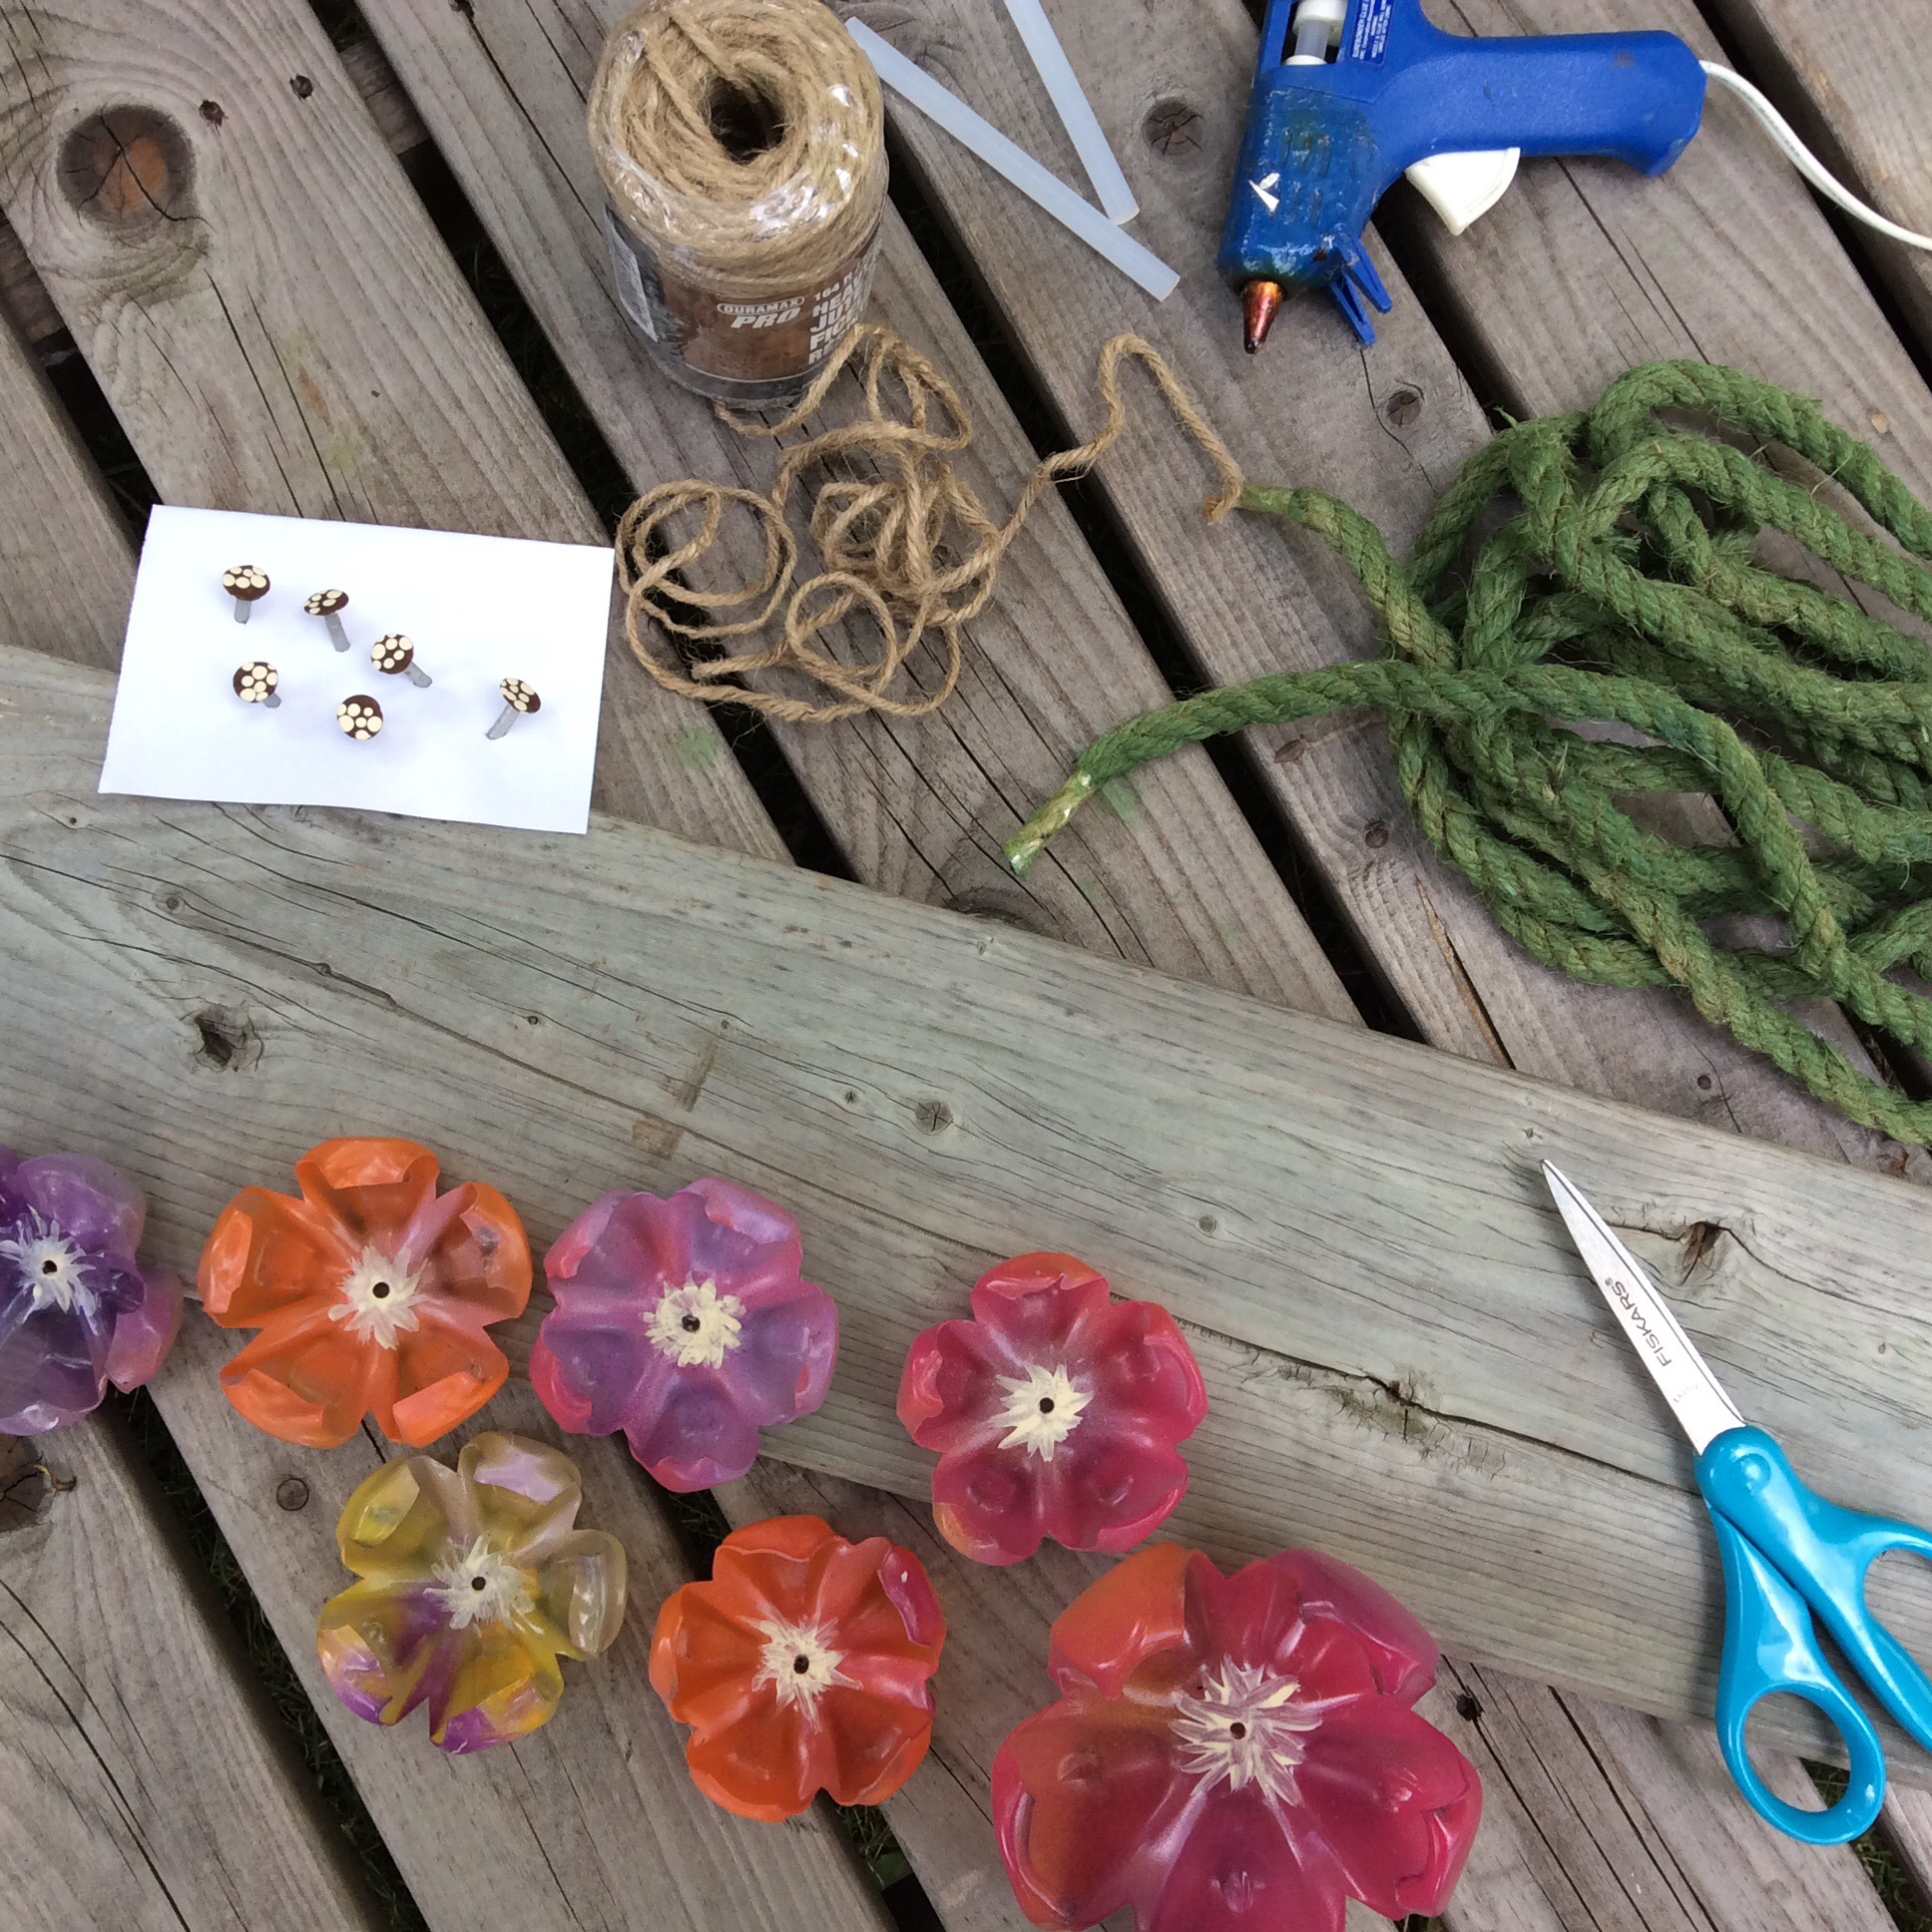
Materials:
- wooden board (mine is approximately 5 1/4 x 32 inches)
- dyed jute (How to dye jute rope for craft projects.)
- water bottle flowers (How to make beautiful water bottle flowers.)
- painted roofing nails (Dry erase board with plastic bottle flower accents. – Instructions section 2. )
- twine
- glue gun with hot melt
- pencil
- drill and drill bit (optional)
Putting it all together:
- Working on a flat surface lay down your background board, mine is a old fence board but you can use any board you like. Dry place (or place without gluing) your water bottle flowers on the top half of your background board. Move these flowers around until you find a placement and number of flowers that you are happy with. Using a pencil mark a small X where the middles of your flowers are located on the board. Remove the flowers to the side, keeping the flowers in order from top to bottom, so that you can easily reassemble them. At this point, since I used roofing nails for my flower centres I drilled a small hole where my pencil X’s are.


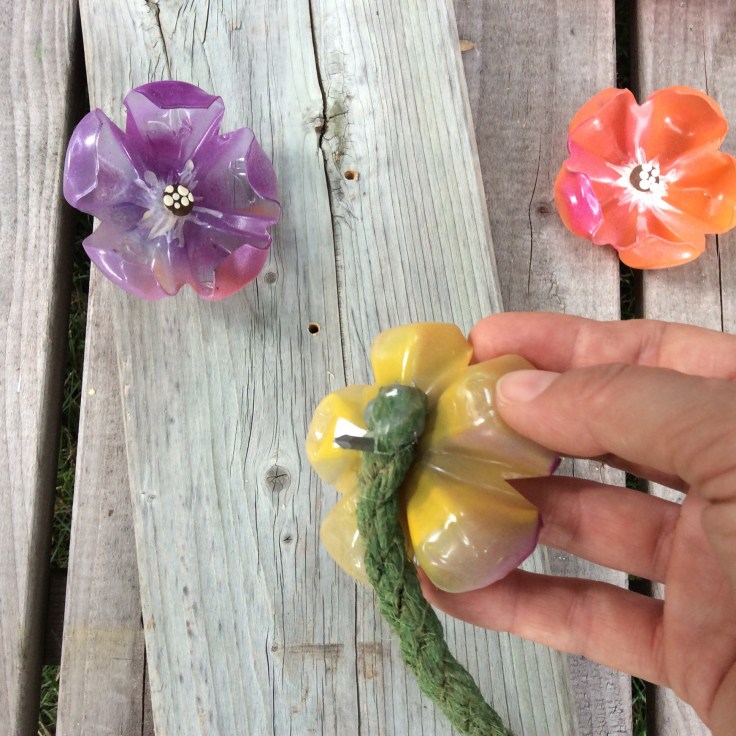
- Starting with the top X take your dyed jute rope and cut a length that reaches from the X to the bottom of your board. Hot melt one end of your rope, so that it does not unravel, this end will be hidden under your flowers and will not be visible. Place the rope beside the flower it belongs to. Repeat this step until you have one piece of jute for every flower you intend to use.


- If you have made your flowers with roofing nail centres, as I did, you will now work these nails through the top of your jute rope pieces, right below the hot melt. If your flowers have cardboard or button centres just hot melt the jute rope to the backside of your flowers.
- Starting with the highest flower hot melt the backside of the flower to the board. Do not glue down the jute, just let it lay loose straight to the bottom of the board. Repeat with the remaining flowers.


- Next gather all the jute rope pieces and wrap them together with twine, on the underside tie the ends of the twine together, tie a twine bow on the front. Trim the jute rope ends so that they are staggered. Hot melt the twine bundle to the board.


- To display your finished creation, either drill a couple of holes near the top of your board, feed a length of twine through the holes and tie. Attach a picture hanger to the backside. Or just leave it be and allow the board to rest against the wall.
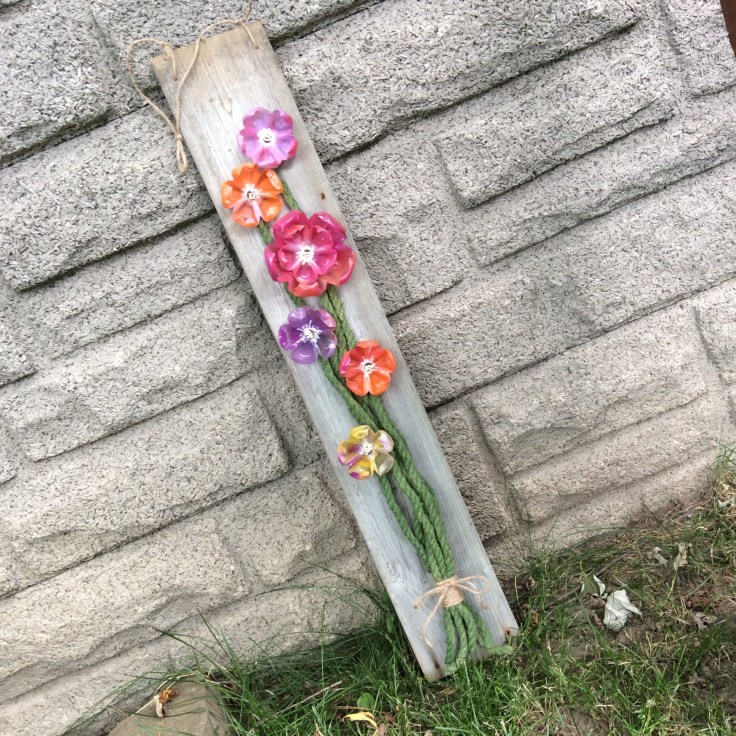
All done, now where to hang it. Mine currently hangs on our backyard gate. It has created a colourful welcome and conversation piece. A lot of the times I get the comment “Oh wow, those are made from water bottles! I would never have guessed.”

Leave a comment